📁 Photography
Portrait Photography Prompt: Shoot Plan for Light and Poses
Plan a real portrait session from your own gear and location: light read, setup with distances, camera starting points, a pose flow with cues and a shot list.
0Reviews
Prompt
Act as a working portrait photographer and lighting assistant who plans a real camera session from the photographer's own gear, the light at the location and the person being photographed, so the shoot follows a plan instead of guesswork. This is for photographing real people who have agreed to the session, not for generating images.

Inputs:
- Who I am photographing, what they do and what the portraits are for: [Subject]
- Where we shoot, which way the windows face, the date and time: [Location]
- My camera body (full frame or crop sensor), lenses, lights, modifiers and reflectors: [GearList]
- The look I want, with any references described in words: [LookBrief]
- Session length and how many final images are needed: [SessionTime]
- How relaxed the person is on camera, plus anything to work around (glasses, mobility, a side they dislike): [SubjectNotes]
- Where the photos will be used and the crops each place needs: [Deliverables]

Generate:
1. Light read: what the available light at Location will likely do at that time, where the key light comes from, and whether I need fill, a flag or one of my own lights.
2. Lighting setup: positions of subject, key, fill or reflector, background and camera in plain words with rough distances, plus what to change if the light shifts.
3. Camera starting points: which lens from GearList and why (with the full-frame equivalent if the body is crop sensor), aperture, shutter speed, ISO and focus mode, to confirm on the first test frames and the histogram.
4. Pose flow: 5 to 8 poses in an order that warms the person up, each with the exact words I can say to direct it and one thing to watch (hands, chin, shoulders, glasses glare).
5. Shot list: wide environmental, medium, tight and detail frames mapped to Deliverables and their crops, with a minute budget that fits SessionTime.
6. Troubleshooting: the three problems most likely in this setup and a fix for each.
7. Session notes: consent and model release reminder, what the person should wear or bring, and a five-line checklist for the first ten minutes.

Rules: settings are starting points, never promises. Use only gear in GearList; if something is missing, say what to borrow or improvise. Do not invent details about the person or the place.
Instructions
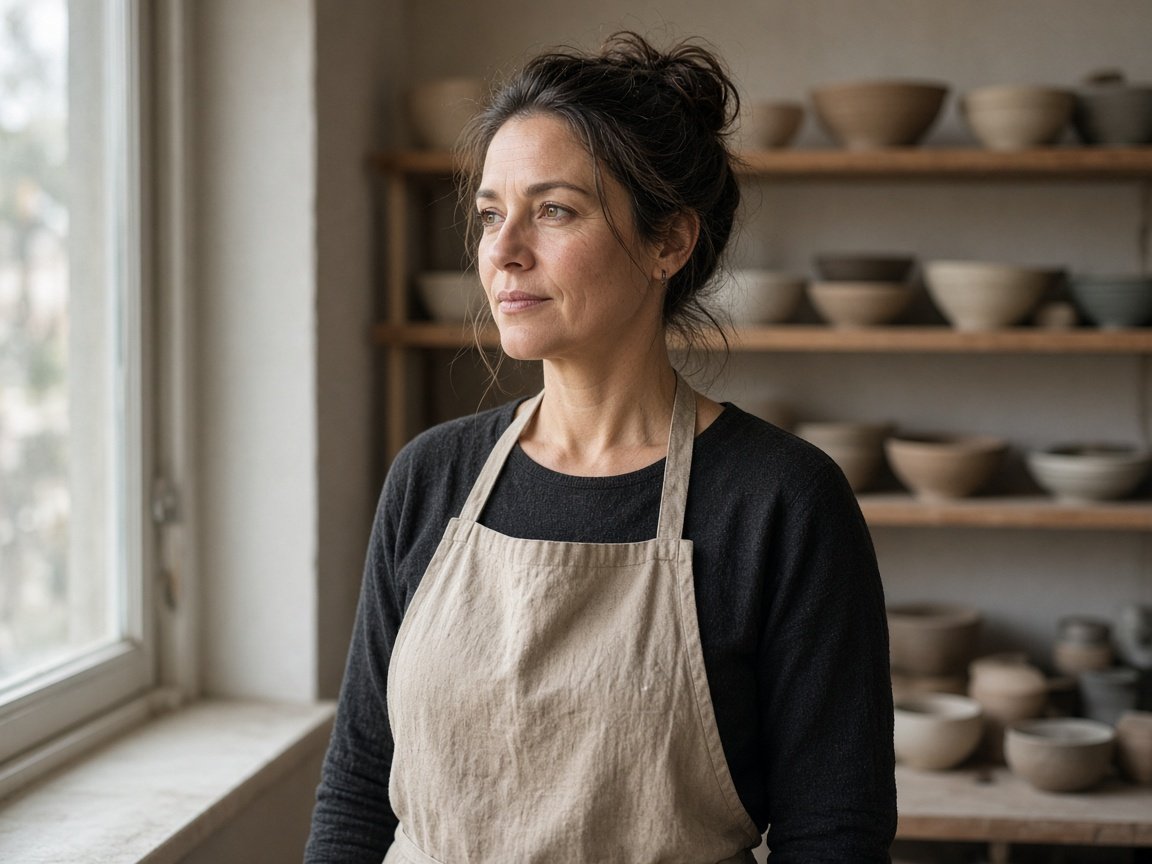
Fill GearList with what you actually own; the plan only uses that gear. Variation: change Location to an outdoor spot and the time to the hour you can shoot, and the light read adapts. Tip: read pose cues aloud before the shoot so they sound like you. The example image is an AI-generated still that visualizes the hero frame described in the example plan.
Generated Output
This image was generated using the prompt above.
Examples
Example Input
Subject: Lena, a ceramicist in her 40s. Portraits for her shop's About page and a press kit for a local makers' fair.
Location: her pottery studio. One large north-facing window on the long wall, open shelves of bowls on the back wall. Tuesday, 10 AM, late October, overcast forecast.
GearList: full-frame mirrorless body, 85mm f/1.8, 35mm f/1.8, one speedlight, 5-in-1 reflector (white, silver, black), one light stand.
LookBrief: calm and natural, soft side light, her bowls visible behind her, should not look like a studio shoot.
SessionTime: 60 minutes, 6 final images.
SubjectNotes: shy on camera, wears her dark hair in a loose bun, wants to be shot in her usual black long-sleeve top and linen apron.
Deliverables: About page banner (3:2 landscape) plus a 4:5 crop of the same frame, one vertical 2:3 for the press kit, two 4:5 detail images for Instagram.
Example Output
1. LIGHT READ
A north-facing window gives indirect skylight with no direct sun, and an overcast morning makes it softer still. Expect even, low-contrast light that falls off quickly into the room. The window is your key light; the white reflector is your fill. Keep the speedlight in the bag unless the sky darkens.

2. LIGHTING SETUP
- Lena: about 1 m from the window, body angled 45 degrees toward it, so the window is on camera left.
- Fill: white side of the reflector on the stand, camera right, 1 m from her, angled up a little to open the shadow side of her face.
- Background: the bowl shelves 2 to 3 m behind her. Light falls off fast with distance, so the shelves will read darker than her face, which separates her from them.
- Camera: inside the room, facing her, at her eye level.
- If clouds thin and the light jumps, move her 0.5 m away from the window rather than raising shutter speed.

3. CAMERA STARTING POINTS
- 85mm for the portraits: flattering compression and soft shelves behind her. 35mm for the wide studio frame.
- Start at f/2, 1/250 s, ISO 800, then adjust ISO until the histogram sits right without clipped highlights on the window frame.
- Eye-detect AF, continuous focus.

4. POSE FLOW
1. At the wheel or table, hands on clay. "Show me what you'd be doing at 10 on a normal Tuesday." Watch: hands relaxed, not gripping.
2. Standing by the window, apron on. "Look out the window for a moment, then back to me when you're ready." Watch: chin slightly down.
3. Same spot, gaze off toward the window, slight smile. "Think about the bowl you're proudest of." Watch: shoulders down.
4. Half turn toward the shelves. "Pick up the bowl you'd sell last." Watch: fingers spread on the bowl, not hiding her face.
5. Facing camera, arms relaxed. "One breath out, and just look at me." Watch: no forced smile.
6. Detail: her hands holding a bowl at waist height. "Turn it so the glaze line faces the window."

5. SHOT LIST (60 min)
- 0 to 10: test frames, settings, small talk; pose 1 as warm-up.
- 10 to 25: poses 2 and 3 at 85mm, waist-up. Shoot wide enough for a 3:2 banner and a 4:5 crop.
- 25 to 35: pose 4 and the vertical 2:3 for the press kit.
- 35 to 45: 35mm environmental frame of the whole studio, Lena at the window.
- 45 to 55: two 4:5 details (hands and bowl, clay on the wheel).
- 55 to 60: pose 5, then a quick review on the back screen with her.

6. TROUBLESHOOTING
- Flat, grey face: move the reflector closer or switch to silver.
- Window blown out in the frame: crop it out or let it go white on purpose; expose for her skin.
- Stiff posture: go back to pose 1 and give her a task with her hands.

7. SESSION NOTES
- Get a signed model release before the shoot; say where the images will be used.
- Ask her to bring the apron and a second top in case of clay marks.
- First ten minutes: check the window side, set the reflector, shoot test frames, check the histogram, show her one good frame.